Gourmet Trail Recipes: Beef (Turkey) Bonaparte

19925A10-9483-4507-925E-A479745DEB25

The word gourmet is relative. Especially when it comes to backpacking food. As a foodie and a long distance backpacker, I struggle to find a compromise. Here is a sample of one of my recipes that takes a little extra time to make, but the reward is worth it!

Beef (Turkey) Bonaparte

Bonaparte, typically made with ground beef, is a casserole, somewhat like lasagna (but easier), that my mom used to make us. It’s salty and cheesy—exactly what I crave on trail! So, I converted it to a dehydrated version.

**NOTE: This recipe makes 4 large 2-person servings. Divide all ingredients into 4**

Ingredients

  • 3 lbs. extra lean ground beef or turkey (7% fat)
  • 2 14.5 oz. cans of canned tomato (the finer the chop the better)
  • 2 8 oz. cans tomato sauce
  • 1-2 T. Minced garlic, based on preference
  • 4 t. Sugar
  • 2 t. Salt
  • 1t. Pepper
  • 16 oz. uncooked corkscrew pasta
  • 16 1 oz. packets of cream cheese
  • 12 1 oz. sticks of string cheese (whole fat if possible)
  • 12 green onions

Optional

  • 1 T. Crushed peppers, if desired

At-Home Preparation

Brown the ground meat in a very large skillet, making sure to cut meat into small pieces as it cooks. Add tomatoes, tomato sauce, garlic, sugar, salt, and pepper (and red peppers) and simmer for 30 minutes.

Spread meat mixture on 2-3 trays in the food dehydrator and completely dry.

Slice onions and dry in a food dehydrator. Or, even better, if you are going on your trip soon, chop up the fresh onions and place them in a snack sized storage bag. (Remember to divide them into 4 separate bags)

Package it up: Divide dried meat and onions into 4 quart freezer bags. If you are bringing fresh onions, continue to keep them separate. Place cream cheese packets (4 each), mozzarella (3 each), and pasta (divided into 4) into quart ziplocks.

On-Trail Preparation

To meat mixture, add just enough water to baggie to barely cover the meat (and onions) and let soak 1-2 hours until soft.

81F4427D-B1C0-403C-ADAE-FCE049816FC6

Boil pasta, adding just enough water for cooking (or find an LNT way to dispose of excess water).

Stir in meat and onions. Break string cheese into pieces and stir in and melt into pasta/meat mixture. Dollop in cream cheese and turn in (as not to completely integrate it in).

Enjoy the creamy, salty goodness!

5B29D946-24FA-4FA9-92E7-DC5FD0B54C9C

Each recipe makes 4 large (2 c.) servings and provides 970 calories each.

If you liked this idea, check out my other Gourmet Trail Recipes.

No way you would put this much work into trail food? Check out my articles entitled Favorite Easy Trail Recipes. New recipes coming soon!

Gourmet Trail Recipes: Mexican “Stuffed” Peppers

F2F3E52D-24DB-433D-BCCC-A8A142A2B7FF

The word gourmet is relative. Especially when it comes to long distance backpacking. As a foodie and a long distance backpacker, I struggle to find a compromise. Here is a sample of one of my recipes that takes a little extra time to make, but the reward is worth it!

“Stuffed” Peppers

This is a variation on my Super Burritos recipe. Instead of stuffing the filling into a tortilla, you will carry some fresh bell peppers out of town with you and slice them into the filling. It’s a nice treat to have fresh vegetables in the backcountry!

This recipe makes one very large 2-serving meal as written. However, it may make more sense to make 3 batches of it at a time and use the whole pound of meat. Just triple the recipe and later portion into 3 bags.

Note: You will need at least 1.3L pot for this recipe, as it is very large!

Ingredients

  • 1/3 lb. extra lean ground beef or turkey (7% fat)
  • 1/3 packet powdered taco seasoning
  • Extra hot sauce to season, as desired
  • 2 Knorr Spanish sides
  • 2 oz. shredded lite cheese
  • 1 small can of black olives, sliced
  • 2 green onions, sliced
  • 1 large bell pepper or 5-7 mini sweet peppers

At-Home Preparation

Brown the ground meat in a large skillet, making sure to cut meat into small pieces as it cooks. Add taco seasoning and hot sauce. You shouldn’t have to drain any fat if you use a 7% meat. (This lean meat dehydrates better and is less likely to go rancid.)

Spread the meat mixture evenly on a parchment-lined tray in the food dehydrator. Sprinkle the sliced olives, onions, and cheese on top of the meat mixture. Completely dry, turning every hour or so.

Package it up: Place meat/cheese/onion/olive mixture into a pint or quart freezer bag.

Place 2 Spanish rice sides into a snack bag. Then, package the rice inside the quart freezer bag with the meat. Store the pepper(s) inside your cook pot while you are hiking to protect them from getting smooshed.

Variation: If you like more traditionally-flavored stuffed peppers, replace taco seasoning with 3/4 c. of you favorite spaghetti sauce. Simmer cooked meat in the sauce for 15 minutes before drying. Replace the Spanish rice with 1 c. instant white rice.

0E44C8EC-8115-4A63-B205-6B9928BD40F5

On-Trail Preparation

1-2 hours before eating, remove the baggie of Spanish rice and set it aside. Then, add just enough water to the quart bag to cover the meat mixture. Close the bag securely and let the meat mixture soak while you hike/ ride/ paddle on a bit further.

Once the meat mixture has softened, cook the rice. Place the rice into your cook pot and just barely cover it with water. If you add too much water to any part of this process, you will be enjoying burrito-flavored soup. If you need to, you can always add a little more water while the rice is cooking. When rice is about ready (6-7 minutes), and most of the water has cooked out of it, add the meat mixture and sliced up peppers into the pot and mix it in with the hot rice. Bring the mixture back to a boil briefly, then remove it from the stove. Let the mixture sit for about 5 minutes to allow it to soften the peppers, mix the flavors, and soak up any remaining water.

Enjoy!

B6838130-D2A3-4F0E-B8C6-C47F1F522DBC

Variation on this recipe: Super Burritos

Calories: Each recipe makes 2 huge (2 c.) servings and provides about 825 calories per serving. Beware: these servings are for hungry people!

Cost: The cost per serving for this recipe is about $4.00, including the peppers and all the other ingredients. This may seem like a lot, but for equivalent calories of a store-bought freeze-dried meal, you would spend $12-15–per person!

If you liked this idea, check out my other Gourmet Trail Recipes.

No way you would put this much work into trail food? Check out my articles entitled Favorite Easy Trail Recipes. New recipes coming soon!

Super Burritos

The word gourmet is relative. Especially when it comes to long distance backpacking. As a foodie and a long distance backpacker, I struggle to find a compromise. Here is a sample of one of my recipes that takes a little extra time to make, but the reward is worth it!


Super Burritos

This is, hands down, our favorite trail recipe. It is filling, delicious, resembles real food, and is relatively inexpensive to make. It just takes a little extra time to prepare, which is why I categorize it as “gourmet”.

This recipe makes one very large 2-serving meal as written. However, it may make more sense to make 3 batches of it at a time and use the whole pound of meat. Just triple the recipe and later divide into 3 baggies.

Note: You will need at least 1.3L pot for this recipe, as it is very large!


Ingredients

  • 1/3 lb. extra lean ground beef or turkey (7% fat)
  • 1/3 packet powdered taco seasoning
  • Extra hot sauce to season, as desired
  • 2 Knorr Spanish sides
  • 2 oz. shredded lite cheese
  • 1 small can of black olives, sliced
  • 2 green onions, sliced
  • 4 large tortillas


Optional

  • 3 T. dehydrated refried beans


At-Home Preparation

Brown the ground meat in a large skillet, making sure to cut meat into small pieces as it cooks. Add taco seasoning and hot sauce. You shouldn’t have to drain any fat if you use a 7% meat.

Spread the meat mixture evenly on a parchment-lined tray in the food dehydrator. Sprinkle the sliced olives, onions, and cheese on top of the meat mixture. Completely dry, turning every hour or so.

Package it up: Place meat/cheese/onion/olive mixture into a pint or quart freezer bag.

Place 2 Spanish rice sides into a snack bag. Or, if you are adding beans, place the rice and beans into their own quart Ziploc. Then, package the rice (+beans) inside the quart freezer bag with the meat.

Package 4 tortillas (they fit nicely in a gallon Ziploc).

On-Trail Preparation

1-2 hours before eating, remove the baggie of Spanish rice and set it aside. Then, add just enough water to the quart bag to cover the meat mixture. Close bag securely and let the meat mixture soak while you hike/ ride/ paddle on a bit further.

Once the meat mixture has softened, cook the rice. Place the rice into your cook pot and just barely cover it with water. If you add too much water to any part of this process, you will be enjoying burrito-flavored soup instead of burritos. If you need to, you can always add a little more water while the rice is cooking. When rice is about ready (6-7 minutes), and most of the water has cooked out of it, add the meat mixture to the pot and mix it in with the hot rice. Let it all sit, off the stove, for a couple of minutes to warm, mix flavors, and soak up any remaining water.

Spoon into tortillas. Or, if they ended up too soupy, break your tortillas up and put them in the pot.

Enjoy!

Variation on the recipe: Stuffed Peppers

Calories: Each recipe makes 2 huge (2 c.) servings and provides about 1,225 calories per serving. Beware: these servings are for hungry people!

Cost: The cost per serving for this recipe is about $4.75, including the tortillas and all ingredients (except beans). This may seem like a lot, but for equivalent calories of a store-bought freeze-dried meal, you would spend $12-15–per person!

If you liked this idea, check out my other Gourmet Trail Recipes.

No way you would put this much work into trail food? Check out my articles entitled Favorite Easy Trail Recipes. New recipes coming soon!

Gourmet Trail Recipes: Potato Salad

The word gourmet is relative. Especially when it comes to long distance backpacking. As a foodie and a long distance backpacker, I struggle to find a compromise. Here is a sample of one of my recipes that takes a little extra time to make, but the reward is worth it!


Classic Potato Salad

Homemade potato salad holds fond memories for me, of family get-togethers and summer BBQs. I recently wondered if it could be something that I could replicate for the trail. More than half of all my recipe ideas fail when I try and make them a reality. This one turned out creamy, savory, and delicious–and only requires cold water to rehydrate. Although it isn’t light, it’s definitely coming along with us this summer.


Ingredients (click on the hyperlinks to see where to buy)

  • 2 c. (2 oz.) Freeze dried potato dices
  • 1/2 Celery rib, chopped, dried (or freeze-dried)
  • 1/4 c. Red onion, finely chopped, dried
  • 4-6 T. (6 packets) Mayonnaise
  • 1/2 T. (2 1/8 oz. packets) Red wine or apple cider vinegar
  • 1/2 T. (1 packet) Sugar
  • 1/2 T. (2 packets) Yellow mustard
  • 1/2 t. Salt
  • 1/2 t. Pepper
  • 1/4 t. Garlic powder
  • 1/2 t. Dill
  • Sprinkle of paprika
img_2192

Ingredients, minus the celery and onion

Optional Ingredients

  • Shelf-stable boiled egg (I have seen them at convenience stores, but I have never actually tried one)
  • 1 T. (1 packet) imitation or real bacon bits
  • 2 Packets relish


At-Home Preparation

Dry the celery and onion in a food dehydrator at 135F for 4-6 hours (until the moisture is gone). The celery will come out looking like weird little worms, but they still taste good. 🙂

Package it up: In a ziploc baggie, mix potatoes, celery, onions, sugar, salt, pepper, garlic powder, and dill. In a pill baggie, package a sprinkle of paprika. Into the large baggie, throw in the small baggie of paprika and the unopened packets of mayo, vinegar, mustard, and bacon bits.


On-Trail Preparation

Remove all of the packets from the large baggie containing the potato mixture and add just enough cold water to the baggie (or in your cook pot) to just barely cover the mixture. Don’t add too much water; you can always add more. Let sit about 10 minutes or longer (if you can wait for about 30+ minutes, it will come out even better).

Once the potatoes have softened, add the mayo, mustard, vinegar, and bacon bits. If you brought an egg, chop it up and add it now. Stir to moisten the whole mix. Sprinkle paprika on top. Let sit another 5 minutes to let the flavors meld. Eat!

img_2193

Makes 2.5 c. salad and provides 655 calories.

If you liked this idea, check out my other Gourmet Trail Recipes.

No way you would put this much work into trail food? Check out my articles entitled Favorite Easy Trail Recipes. New recipes coming soon!

Gourmet Trail Recipes: Hummus

The word gourmet is relative. Especially when it comes to long distance backpacking. As a foodie and a long distance backpacker, I struggle to find a compromise. Here is a sample of one of my recipes that takes a little extra time to make, but the reward is worth it!


Hummus

At home, hummus is one of our go-to snacks. You buy dried hummus, but the quality and calories are lacking. On a whim, I tried drying it myself and I was surprised how easy it was and how good the finished product was! I only list this as a “gourmet” recipe because it does require a food dehydrator or an oven. Pita chips or tortillas pack nicely and, in combination with the hummus, make a great stand alone snack or meal.


Ingredients

All you need is your favorite homemade or store-bought hummus!


At-Home Preparation

Take your favorite 10 oz. hummus and stir it up well (especially if it has a topping). If you like, stir in extras. I like to add Tapatio to spice up the red pepper flavored ones, or lime juice to sweeten the plain ones. Divide the hummus in three and spread it with a knife or spatula on three fruit leather trays in your food dehydrator. If you don’t have a dehydrator, you can spread the hummus on parchment paper or directly on a cookie sheet for drying in the oven. Either way, try and spread it evenly so that it is uniformly thin across the surface.

If you are using a dehydrator, set it to about 100F. If you are using an oven, set it on the lowest possible setting, preferrably 180F or below.

In the dehydrator, the hummus will take about 8-10 hours to dry. When it is done, it will crack and easily flake off of the trays. In the oven, it will only take about 1 hour, so keep your eye on it. You don’t want to cook or burn it.

img_2167

Hummus spread on fruit leather tray in dehydrator

Divide into three small ziploc baggies. Since hummus is oily, I recommend you store it in the freezer to prevent it from going rancid. However, I have had it out of the freezer for up to 2 months with no problems.

img_2175


On-Trail Preparation

About 5 minutes before you want to eat, pour just enough (cold) water onto the dry hummus to cover it. Do no add too much water; you can always add more, but it’s hard to take out. Let it sit 5 min. Stir again. If it is not creamy enough, add a tiny bit more water or up to 1 T. olive oil. That’s it!

img_2171

Each serving is 200-370 calories, depending on the brand and whether or not you added oil. (Ex. Sabra hummus with no oil comes out to 235 calories.) Each baggie will make about 7 T. hummus and weighs about 1.5 oz.

If you liked this idea, check out my other Gourmet Trail Recipes.

No way you would put this much work into trail food? Check out my articles entitled Favorite Easy Trail Recipes. New recipes coming soon!

Gourmet Trail Recipes: Cheesecake

The word gourmet is relative. Especially when it comes to long distance backpacking. As a foodie and a long distance backpacker, I struggle to find a compromise. Here is a sample of one of my recipes that takes a little extra time to make, but the reward is worth it!

Cheesecake

This is a non-cook, creamy, graham cracker-crusted cheesecake that is pretty easy to make in the backcountry. It works best with a large diameter pot and in cooler temps. The ingredients list makes 2 full cheesecakes!

Ingredients (makes 2 cheesecakes)

  • 1 Box Jell-O No Bake Real Cheesecake (without fruit filling)
  • 6 t. Sugar (or 6 packets)
  • 1/2 c. Dehydrated milk (preferrably whole) (or 2 oz. powder, by weight)
  • 1 oz. Freeze dried fruit of your choice (you could also used dehydrated or ~1/2 c. fresh–if you have huckleberries on trail DO THAT.)
  • 4 T. Olive oil (or four 1/2 oz. packets)

At-Home (or in hotel) Preparation

First, divide the recipe into two portions and repackage (if you care if it resembles a cake). Separate 1/2 of the “Crust mix” (about 1/2 c.) into two separate ziplock baggies. Add one T. sugar (3 packets) to each baggie of crust mix.

Then, divide the filling mix equally into two separate baggies in the same way. Add 1/4 c. dried milk and the dried berries to each baggie of filling mix.

IMG_1501.JPG

Each cheesecake will look like this when repackaged

On-Trail Preparation

Add 3/4 c. + 1 T. cold water to the baggie with the filling/milk/fruit mixture (do not add too much water). If you are using fresh berries, keep them aside until the end. Stir or knead the bag until all the powder is mixed in; it should be the consistency of pancake batter. Let the filling mixture sit until it has thickened to the consistency of pudding. This can take up to an hour. The colder it is, the faster it will occur. (Note: If you are impatient and don’t wait for it to thicken, it is still delicious.)

In the meantime, pour the contents of the crust baggie into a cook pot (the wider diameter the better). Mix in 2 packets (1 oz.) olive oil. Stir until all the crust mix is moistened. Press into the bottom of the cook pot like this:

img_1497

When ready, spoon the thickened filling onto the crust and distribute it evenly. If you have fresh berries, throw them on top. That’s it.

Yummmmm!

img_1499

Each cake makes about 2c., has  1100 calories, and weighs about 8.5 oz. packages.

If you liked this idea, check out my other Gourmet Trail Recipes.

No way you would put this much work into trail food? Check out my articles entitled Favorite Easy Trail Recipes. New recipes coming soon!

PCT For The Newbie: Resupply

I hiked the PCT 10 years ago as my first long-distance hike. Last summer, I hiked my 10th long trail; I have made it my lifestyle. As such, I have had the opportunity to meet a lot of other hikers who have way more miles than I do. We have talked about our strategies for route finding, gear, and resupply. I’ve been relieved to hear that, like me, they have all made mistakes and changes over the years. The one thing I have learned for certain is that no two people do it exactly the same way. 

That said, I can tell you that a lot of people have made the same mistakes. Most of the time, these “mistakes” are just different ways to do things that make that individual happier/more comfortable on trail. Sometimes, these mistakes cost people a lot of money. And, occasionally, a mistake can cost someone their hike.

Because resupply is the most obvious difference between backpacking and thru-hiking, it is the most intimidating part for many prospective thru-hikers, even if they have a lot of backpacking experience. This is also where I have seen people make their biggest mistakes.

First, let’s talk about what resupply is.

Since you don’t want to carry everything  you need for a 5-month hike, you are going to want to replenish your consumables (food, fuel, TP, hand sanitizer, sunblock, maps, etc.). Fortunately–on the PCT–the route crosses roads at regular intervals (every 2-10 days) where you can go to town to resupply those consumables.

There are 2 ways to do resupply, both have pros and cons. Let me talk about the pros of each.

Buy-As-You-Go

Many of the towns/resorts along the PCT have ample food and hiker items to get you to the next resupply town/resort. With this method, you buy everything you need in town when you get there. With this method:

  • You are going to town already (all resupply strategies include towns unless you are fully “supported”–and even then you are probably going to want to go to town occasionally for a hot meal).
  • You don’t have to worry about items being lost in the mail.
  • You don’t have to adjust your hiking to account for post office hours of operation, which can be very limited in small towns.
  • It may be cheaper than mailing boxes ahead, depending on how expensive the town/resort is.
  • You can buy whatever food sounds good to you at the time (I can tell you, you will probably acquire odd cravings out there).
  • If, for some reason, you can’t complete your hike, you will not have wasted time and money preparing everything ahead of time.

Just a word on this last point. From what I understand, the attrition rate on the PCT is usually at least 50%. You are probably thinking, “that isn’t me”. So does everyone else! I was fortunate enough 10 years ago to be one of maybe 70 people to complete the trail. There were times I almost quit, despite my complete devotion to it. In fact, of the 10 long trails I have started, I have had to cut 5 of them short. There are so many variables when you are on a long trail, some of which are out of your control. I have gotten off trail due to injury, waterborne illness, family emergency, and lonliness. So, if you have bought all of your consumables in advance of your hike, you should be prepared (if you end up having to cut your hike short) to be stuck with a lot of trail food and potentially out a bunch of money.

Mail Drops

The alternative method is to do mail drops. With this method, you mail a box to yourself in advance (usually via “General Delivery” at the Post Office) containing your resupply items for the next section of trail.

This way:

  • You can mail whatever you want to yourself and not be limited to what the town has.
  • You don’t have to stress about running all around town to resupply when you get there. You can enjoy your time there!
  • Depending on the town or resort that you are going to, sometimes this is the more cost-effective method. Some resorts really have to elevate their prices to account for having to haul in supplies to their remote location.

Mail drops are going to be very useful for people with specific dietary needs or who need hard-to-find items. If you are vegan or diabetic, or your headlamp takes a special battery, this strategy will make your life easier.

A ressupply box operation in progress (Photo Cred Whitney

A resupply box operation in progress (Photo Cred Whitney “Allgood” LaRuffa

Bounce Bucket

A version of the maildrop strategy is the bounce bucket or box. A bounce box is a container that you mail to a town ahead of you on the trail. But, unlike mail drops, when you reach that town, you pick the box up from the post office (or hotel), collect just a few items from it, then mail it (and the rest of its contents) ahead of you again.

Some people actually use a 3 or 5 gallon bucket because it is durable and easy for the postal employees to find on the shelf (with two hundred other hiker boxes). Some items people put in bounce buckets/boxes are: backup socks, stakes, ground sheets, repair tape, pack liners, sporks, Platys, or other items that are likely to wear out or break. Also, some people like to include items for town stops like: a change of clothes (for when they do laundry), laundry detergent, razors, toenail clippers, hairbrushes, iPads, or a camera charger. Also, it may be useful to include items that you don’t want to buy a whole box of in every town, or are hard to find in some towns like: mini Body Glide, a ziplock bags, odd-sized batteries, a favorite drink mix, or medications. I like to include dried minced garlic, veggies, fruits, refried beans, cheese, and meats, plus packets of mayo, mustard, cream cheese, and Cholula. That way, I can buy whatever staples that sound good at the time in town and bulk them up with flavor, protein and calories!

Note: Because you will probably out-hike the box if you try and do this at every town stop, I suggest, at most, only getting your box every other or every third town.

img_1470

An example of a bounce bucket

Biggest Mistake

The most common regret I hear, with regards to resupply, is from hikers who made every single meal for the trail in advance of the hike. It’s an easy trap to fall into in January and February when perspective thru-hikers want to be doing something productive for the big hike! Most hikers I have talked to about this have told me that their tastes, caloric needs, and cravings changed a lot throughout the duration of their first long hike. While I like scoring the yummy homemade meals out of the hiker boxes when they are sick of them (or they have to get off the trail), I feel bad for all of the wasted time, energy, and money.

Best Bet

The majority of thru-hikers I have talked to use a hybrid strategy, and that seems to be the most successful. They buy as they go in the towns with good supermarkets and aren’t overly expensive. And, they have a family member mail a box to the towns that don’t have a lot, allowing for a little supplementation if something sounds good at the time. Add a bounce bucket every 3-4 town stops to grab some replacement items, and a well-rounded resupply is born! (How do you know which towns have what? Yogi’s PCT Handbook actually has a table in it listing every town and what you can expect to find in the way of hiker-specific resupply items. It is a helpful planning tool. I am sure there are other online references, too.)

Another possible hybrid strategy is to do maildrops from a large town while you are on trail. For example, some people resupply for all of Oregon once they reach Ashland, the furthest south town stop in Oregon. This way, they have a better idea if they will be able to complete the trail, their food will be fresher, and they will have a better understanding of what their body is craving right then.

img_1471

Buying food for several mail drops (Photo cred Sage Clegg)

If any of these terms are new to you, please refer to my  Thru-Hiking Glossary.

Gourmet Trail Recipes: Potatoes Au Gratin

The word “gourmet” is relative. Especially when it comes to long distance backpacking. As a foodie and a long distance backpacker, I struggle to find a compromise. Here is a sample of one of my recipes that takes a little extra time to make, but the reward is worth it!

Potatoes Au Gratin

Here’s a cheesy, oniony, bacony backpacking version of one of my favorite comfort foods. It also packs in the calories! Freeze dried potatoes are the only way to make this recipe with substance. Otherwise, you can use dehydrated mashed potatoes.

Ingredients

  • 1.5 c. Freeze dried potato dices
  • 1 packet (or about 3-4 T.) cheese powder (can use from a mac n’ cheese box)
  • 1 T. Whole milk powder
  • 1/2 c. Freeze dried (or dehydrated) shredded cheddar cheese 
  • 1/2-1 t. Dried minced garlic
  • 1/2 t. Ground black pepper
  • 2 green onions, chopped, dried (or about 2T. Jarred chives)
  • 1/3 c. French fried onions
  • 4 slices shelf-stable bacon, chopped (1/4 c. Bacon bits could also be used)
My favorite cheese powder

My favorite cheese powder

Optional Ingredients 

  • 1/4 c. dried green chiles

At-Home Preparation

Place first 6 ingredients in a pint or quart freezer ziplock bag. Place bacon and fried onions in a snack bag.

IMG_2030.JPG

On-Trail Preparation

Bring 1 c. water  to a boil. Pour over potato mixture and let sit 5-10 min, until potatoes are tender. Stir in bacon/onion mixture. Eat!

The finished product (minus a few bites)

The finished product (minus a few bites)

Makes about 2c., has 980 calories, weighs 5.8 oz. with baggies.

If you liked this idea, check out my other “Gourmet Trail Recipes”.

No way you would put this much work into trail food? Check out my articles entitled “Favorite Easy Trail Recipes”. New recipes coming soon!

Gourmet Trail Recipes: Carrot Cake

The word “gourmet” is relative. Especially when it comes to long distance backpacking. As a foodie and a long distance backpacker, I struggle to find a compromise. Here is a sampling of one of my recipes that takes a little extra time to make, but the reward is worth it!

Carrot Cake

Okay, this one is kinda silly and I bet none of you will make it, but I love to go all out when I am hiking with a friend on their birthday–and make them a cake! Carrot cake is one of my favorites.

It really helps if you have a fry pan and a canister stove that can burn really low. A wider diameter burner is better than a small one. A scorch buster doesn’t hurt either. You can probably make it in a 0.9-1.3L pot, but you will just have to rotate it around on the burner to make sure it doesn’t scorch.

Ingredients

  • 1 c. Carrot cake mix (Duncan Hines makes one that has a separate packet of dried carrots and raisins)
  • 1/2 packet of dried carrots and raisins
  • 1/3 c. Dried matchstick carrots (if you couldn’t find the Duncan Hines mix)
  • 1 small box of raisins (if you coudln’t find the Duncan Hines mix)
  • 1.5 t. Egg powder or Egg Replacer
  • 2.5 oz. Olive oil
  • 1/4 container of cream cheese frosting (package separately)
  • Birthday candle

or

  • 1/4 c. Confectioner’s sugar
  • 1 t. Dried whole milk (package these together in their own snack ziplock)

or

img_2015

Dried carrots and raisins that come with the Duncan Hines boxed carrot cake mix


img_2014

Examples of pre-packaged olive oil

At Home Preparation

Put the cake mix, carrots/raisins, and egg replacer in a small ziplock bag. In a separate bag, package your frosting or frosting mix.

img_2016

On-Trail Preparation

To the cake mix baggie, add just enough water to make it cakey, but not too runny. Let sit about 20 min to allow carrots and raisins to rehydrate.

If making your frosting, add a small amount of water to the sugar/milk mixture to make a thick glaze.

Put a small amount of oil in the bottom of your fry pan and turn stove on its lowest setting. Squirt cake mix out of the baggie into the pan. Cover and allow to cook until you see holes from bubbles in the middle of the cake–about 2o min. (Note, I live at 8000′, so I don’t know how long it would take at sea level).

img_2022

Finished cake has holes throughout, including the middle

Allow to cool slightly and add frosting.

img_2024

Add candle(s) if it is someone’s birthday. 🙂


If you liked this idea, check out my other “Gourmet Trail Recipes”.

No way you would put this much work into trail food? Check out my articles entitled “Favorite Easy Trail Recipes”. New recipes coming soon!

Stoveless Isn’t Lighter

Considering going stoveless on a long hike? There are a lot of good reasons to do so. But, if weight savings is your highest priority, you’re doing it for the wrong reason.

Benefits of going stoveless include:

1. Without worrying about a stove, a pot, a windscreen, and fuel, you have less stuff to worry about. This simplicity can be very freeing.

2. Less wait (no, not weight). I just mean you can eat right away without having to fire up and heat your food. This is especially nice when you roll into camp late and you are tired.

3. Don’t have to deal with resupplying fuel. Sending fuel in the mail is not straight forward. It has to go “ground only” and must be properly labeled with specific wording. Ordering it online can be difficult for the same reasons. And, finding your type of fuel in a small trail town may be difficult too.

4. Burn bans don’t affect you.

5. No permit required. In California, you are required to have a Fire Permit for operating a stove. It is free, not difficult to obtain, and the requirement is unlikely to be enforced, but it’s one less thing to worry about.

6. When you walk into town, your food setup will weigh nearly nothing.

7. Potentially less bulk. Hydrated foods like bars, tortillas, nut butters, cheese, and nuts are calorically dense and can take up little space. This can be handy when using a bear canister.

8. Nutrition. Many of the non-cook foods are more nutrient dense than the dehydrated foods most thru-hikers eat.

9. Many people make the argument that it is lighter. It can be, but the way a lot of people do it, it is usually about the same or even heavier.

Comparing The Food

For comparison sake, let’s talk about dinners. The other meals of the day between cookers and non-cookers seem to be about the same.

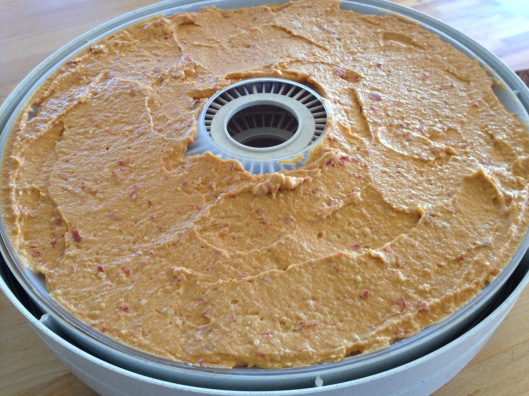
The dehydrated dinners I make that pack in 700 calories weigh about 4-5oz. at most. I try to add coconut cream powder, whole milk powder, sour cream powder, dried sausage crumbles, or freeze-dried shredded cheese (some of which have 180 calories/oz.) when I can to increase the calorie to weight ratio.

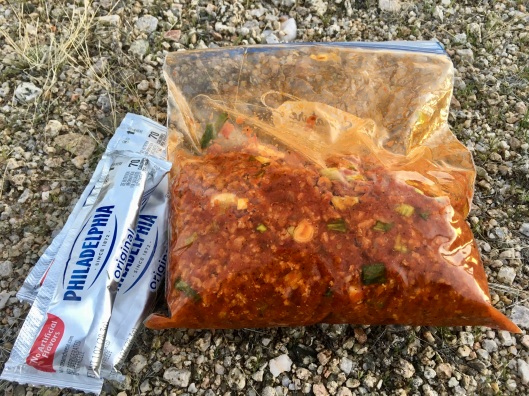
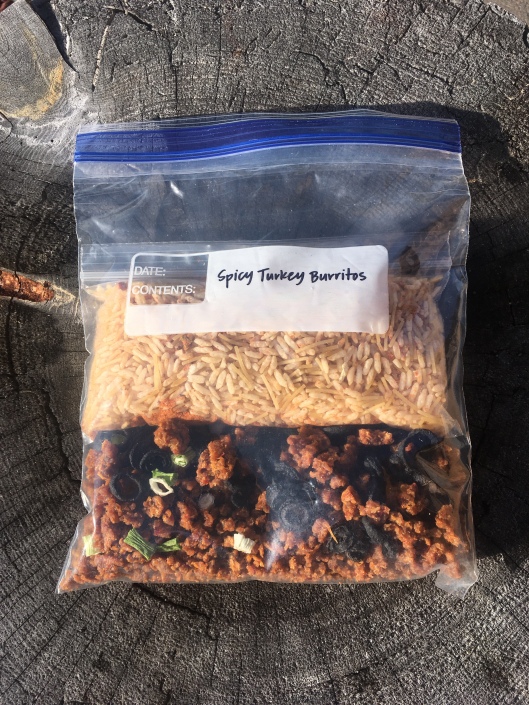
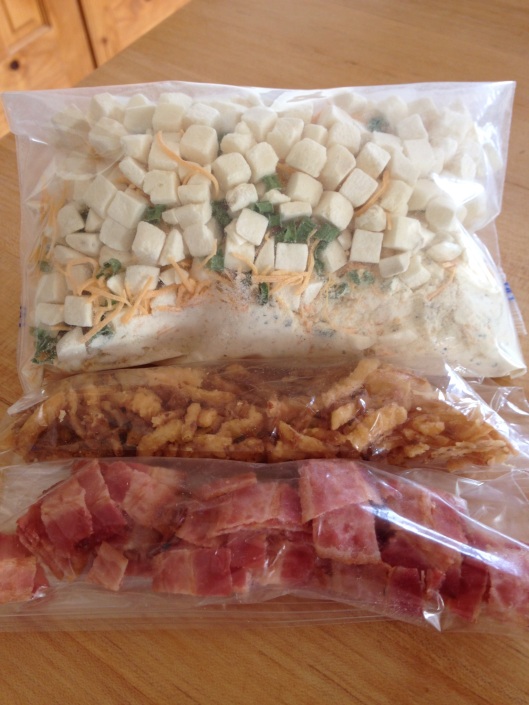
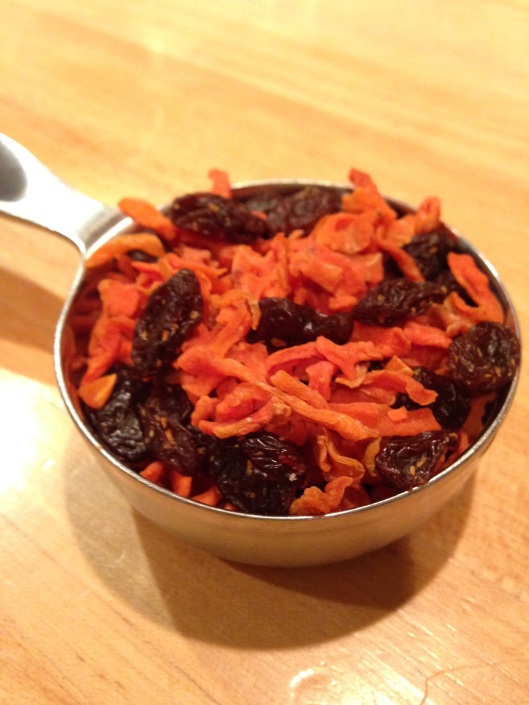
Although most dehydrated meals can also be cold soaked, most non-cook hikers that I have seen are more likely to eat bars, jerky, nut butters, nuts, coconut flakes, M&M’s, trail mix, tuna, and tortillas—most of which contain some water content (read “weight”). To get 700 calories from these types of food, one would need to carry about 6-7 oz. per night.

img_1317

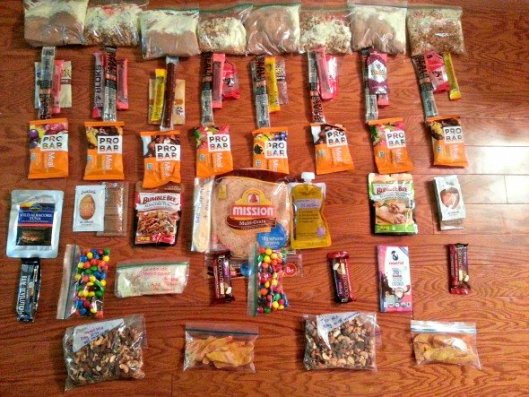
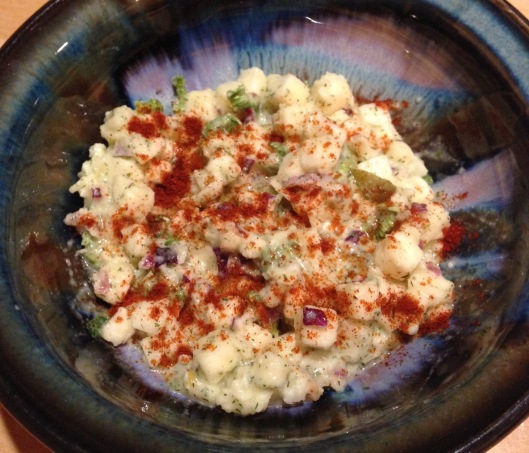
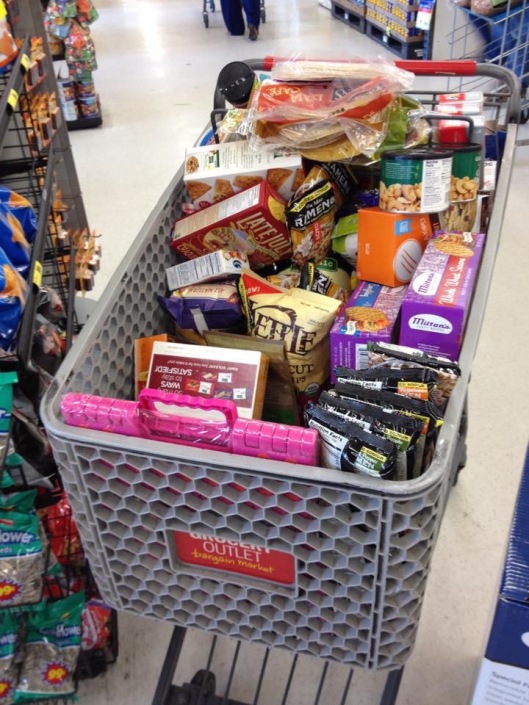
A typical stove-free resupply. Photo Cred TrailtoSummit.com

Comparing The Cook Kits*

I personally own 4 different cook stoves/kits, so I compared them. For each cook kit, I weighed the burner, the windscreen (if needed), the container to hold the fuel, the cookpot/lid, and the stuff sack. Assuming I want to cook up about 700 calories per dinner, I also figured out the weight of the fuel for each dinner (although conditions can be very variable). It should be noted that there are lighter kits than mine and there are heavier. But, the ones I used for this comparison are definitely on the lighter end of the weight spectrum.

*If you would like a breakdown on the components of each kit, feel free to message me.
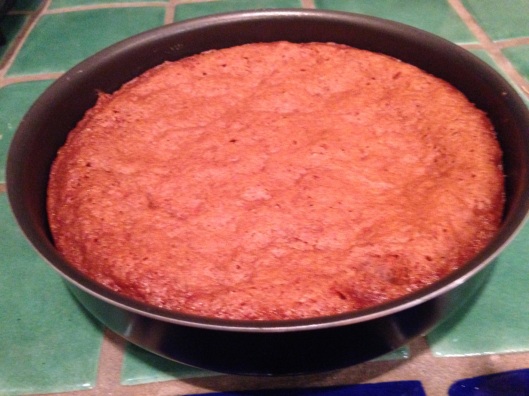
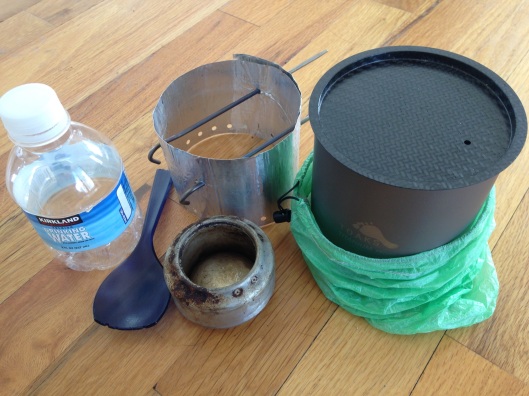
Solid Fuel

Not many people choose this method anymore due to its finicky-ness, but I want to include it because it has been my method of choice for 7 years now. A few companies make a solid fuel “tablet” that you light under your cook pot to bring water to a boil (or at least to very hot). The advantages of solid fuel include: inability of spillage of fuel, very light weight, and due to the really low intensity of the flame, one can usually get away with a smaller cook pot with no handles. The disadvantages are that it is very sensitive to wind and cold, it takes a long time to heat water, the tablets are hard to find (although, they are easy to ship or carry extra), and there is some odor to the burning tablet (especially Esbit brand).

My solid fuel kit weighs 3.6 oz. The fuel needed to heat up a pint of water weighs about ½ oz. per night.

img_1981

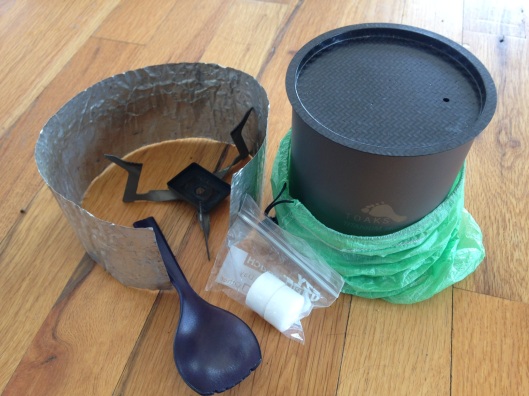
A lightweight solid fuel kit

Alcohol

When I hiked the PCT 10 years ago, many people were still cooking with alcohol stoves. Alcohol burns clean, and it is easy to find (in the form of the product HEET) in almost any town with a convenience store. However, alcohol stoves take some practice and they are sensitive to wind and cold temperatures.

My alcohol stove kit weighs about 4 oz. and the alcohol weighs about 0.75 oz. to heat a pint of water.

img_1979

A lightweight alcohol kit

Canister/Pressurized Gas

Most thru-hikers these days are using canister stoves, probably due in part to an increase in the frequency of burn bans each summer. When a burn ban is in effect, The only stoves allowed must have a shutoff valve (although there is zero enforcement). They are also really convenient; all you need to do is turn on the valve, light it, and you are eating in just a few minutes!

They are quite efficient on fuel, however, to carry gas under pressure, the empty fuel canister itself weighs 3.5 oz.! Also, these canisters are usually only sold in outdoor retail stores, are pricey, can only be shipped via ground, are not supposed to be thrown in the garbage (they can be recycled if you can safely puncture them), and it is hard to know how much fuel is in them.

My canister fuel kit weighs about 7.8 oz. in total (including that empty canister). The fuel itself needed per night weighs about 1/3 oz. (although, it should be noted that because it is hard to know how much fuel is in the canister, most people usually end up carrying far more fuel than needed and possibly even another canister, which weighs 7 oz. full).

img_1980

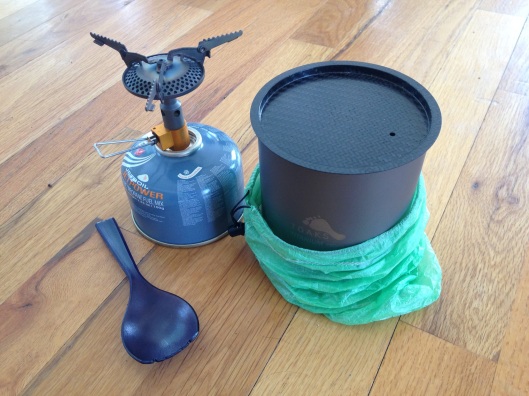
A lightweight canister stove/kit

Wood Burning

Wood stoves are lightweight, there is no fuel-weight penalty, and they kinda make you feel like a badass cavewoman. The downsides are that they are difficult (not impossible) to do in a completely LNT-manner, they require fairly dry tinder to work at all, they take some time (to collect materials, start the fire, and then to bring water to a boil), they cover your cook pot (and hands) in black soot, and everything you wear after cooking with one will smell strongly like wood smoke.

My wood burging kit weighs 5 oz. The fuel weighs nothing, as you burn sticks, pine cones, and dry grass that you find when you stop for dinner.

img_1982

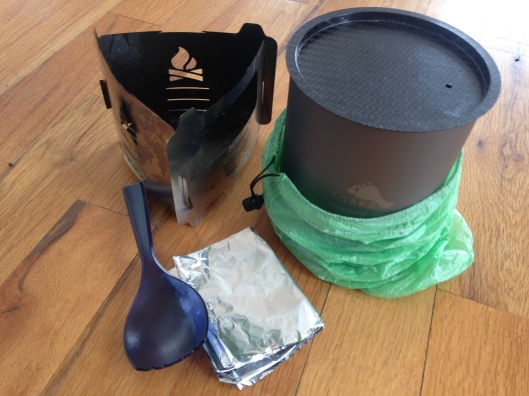
A lightweight wood burning kit

Comparing No-Cook and Cook

These numbers include the weight of the dinners (no other meals or snacks), fuel needed for all of the dinners, plus the cook kit from above.

Non-Cook
A traditional non-cook dinner weighs about 6-7 oz. per meal for the food itself. So, dinners for a 4-day resupply (3 dinners) would add up to 18-21 oz. However, on the day walking into a resupply, non-cook will weigh nothing.

Solid Fuel
Dehydrated or freeze-dried food weighs about 4-5 oz. per dinner for the equivalent calories. So, on a 4-day resupply—dinners plus a solid fuel cook kit—will weigh about 17-20 oz. On the way into town, it will still weigh 3.6 oz.

Alcohol
Again, using dehydrated food, on a 4-day resupply, the alcohol method weighs 18-21 oz. with dinners. On the last day, it will weigh 4 oz.

Wood Burning
On a 4-day resupply (assuming you can find dry materials to burn) this kit + dinners will weigh 17-20 oz. On the way into town, it will weigh 5 oz.

As you can see, cooking and non-cook end up being pretty close in weight for a 4-day resupply. Choosing non-cook for resupplies lasting longer than 4 days will end up being quite a bit heavier than if you cook with almost any method (although 4 days is pretty typical on the triple crown trails).

Making the Choice to Cook or Not

Cook methods usually end up being lighter at the beginning of the resupply section, and non-cook is lighter at the end (usually on the last day), so making the decision to cook or not should really depend on factors other than weight. Remember, there are also advantages to having a stove and a metal pot:

1. You can have hot coffee.

2. A hot meal at the end of the day can be a real morale boost; you can feel more like you are eating “real” food.

3. A hot meal can warm you up on a cold day.

4. A warm meal is more easily digested.

5. There is more potential for variety.

6. In an emergency, you can boil water for heat or water purification.

The Lightest Method

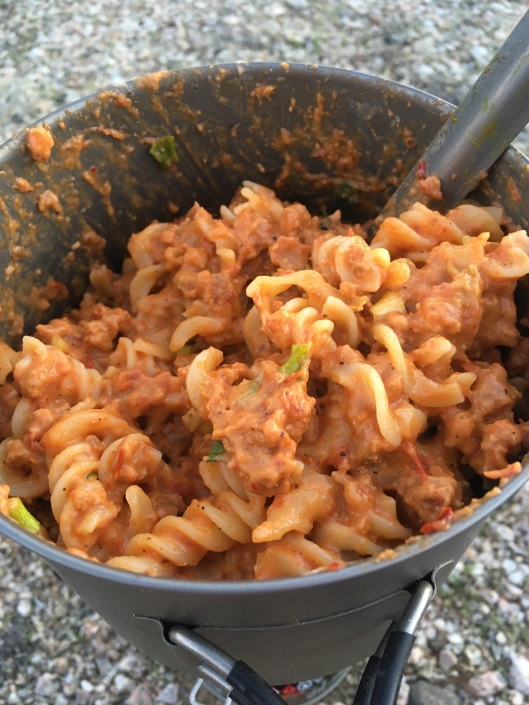
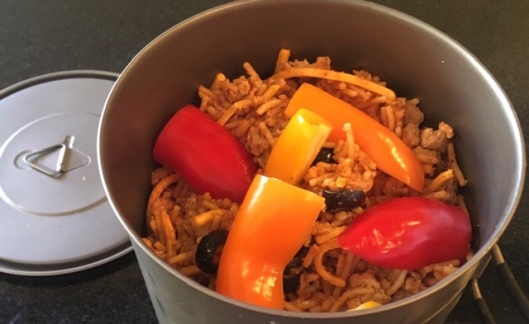
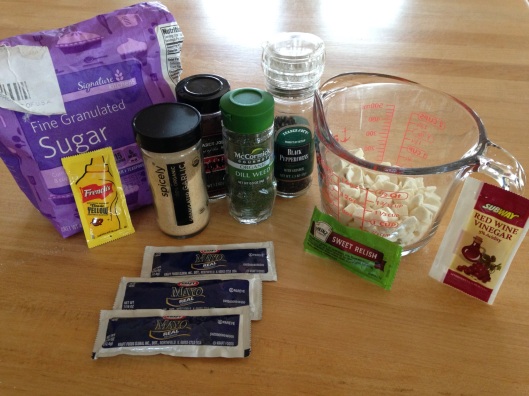
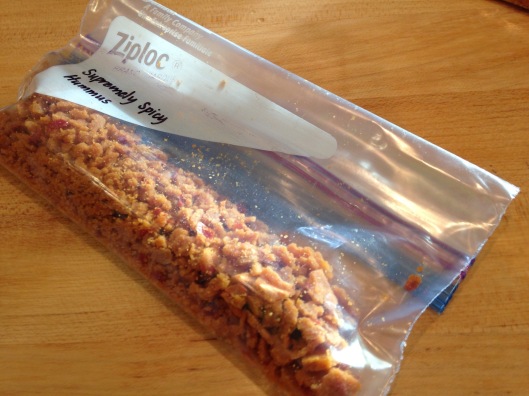
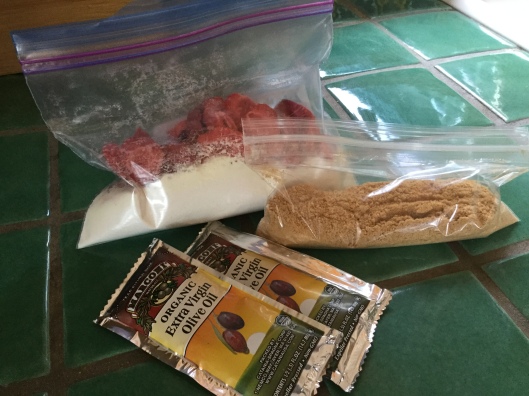
As I alluded to above, there is actually one way you can make no-cook the lightest choice all of the time. Instead of eating bars and nut butters, tortillas and trail mix, you can “cold soak” dehydrated food. In this strategy, you take dehydrated or freeze-dried dinners (the same as if you were cooking) and add cold water instead of hot, allowing the food to rehydrate over 30 minutes to 2 hours. Therefore, your food is as light as possible, but you will not have any of the weight of a cook setup. A 4-day resupply would only weigh a cold-soaker 12-15 oz.** Weight is the obvious advantage. The downside is the food: can you stand to eat cold mashed potatoes or mac n’ cheese?

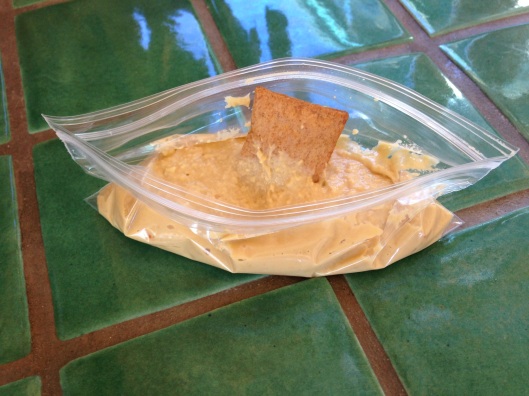
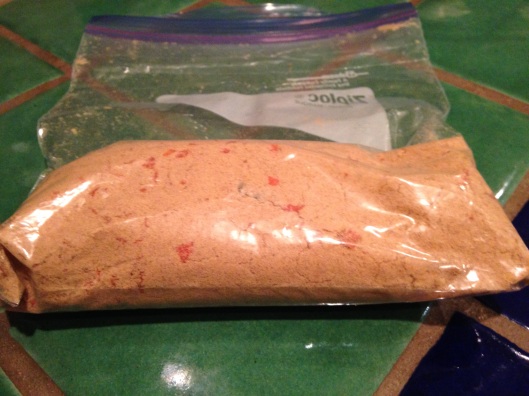
**Although you can just rely on [lighter and more compact] freezer bags for cold soaking, many people who choose this method use a small plastic container (peanut butter or gelato) to soak their food. This way, they can add water to their food, secure the leakproof lid, throw it back in their pack, and walk for the last few miles while it rehydrates. Hopefully, by the time they get to camp, it is ready. These containers usually weight about 2 oz., but you are still only looking at 14-17 oz. for a 4-day resupply.

img_1975

A container that could be used for cold-soaking

Conclusion

There are pluses and minuses to all of these methods. You have to decide what your priorities are and what inconveniences you are willing to put up with. Whatever you choose, it is not set in stone. You can fairly easily make changes as you go. My point is, don’t stress out about it too much. Have fun with your planning and remember that “once you are on the trail, half of the work is done”. (Quote by d=rt)